 |
| Sospeso Transparente |
Hi friends many of you may be already familiar with the beautiful craft of Sospeso Transparente but if you are hearing about it for the first time...Sospeso Transparente is a 3D Volume Decoupage craft invented and patented by Italian artist Monica Allegro .It basically involves heating and shaping flat designs into gorgeous 3 dimensional beauties!
 |
| Sospeso Transparente |
These Sunflowers are my first attempt at Sospeso Transparente and I had so much fun arranging the them in all sorts of places in my house- the picture above is of our Passion fruit Vine adorned with Sospeso Transparente Sunflowers!
 |
| Glass Cabochon |
I could make a matching "Sunflower" Glass Cabochon pendant for my flower basket using some DCWV paper. Click here for the
Glass Cabochon tutorial |
| Sospeso Transparente |
Sospeso Transparente is one of the
most magical crafts I have come across...it is indeed sheer magic to be able to convert a printed film of Sospeso Transparente into a magnificent 3 dimensional object!
 |
| Sospeso Transparente Printed film |
There are different techniques in Sospeso Transparente and the simplest is using printed films. I have shared a very detailed tutorial about the materials and techniques at my
Sospeso Transparente tutorial post at Crafters Corner .But to simplify it there are actually just 3 steps involved in Sospeso Transparente with printed films :
- Cut the design
- Heat the design
- Emboss
 |
| Sospeso Transparente tutorial |
The flowers look gorgeous just as they are but you can go ahead and add fancy flower centers such as rhinestones, pearls, glitter balls etc. I had once used chunky glitter on
Felt Sunflowers and loved the effect so this time too I used chunky glitter but gave a domed center to my Sospeso Transparente sunflowers
 |
| Sospeso Transparente |
How to make a domed Flower Center
Sharing a mini tutorial on how to make the domed center of the sunflower. You can use the technique not only on Sospeso Transparente flowers but also on felt, foam and paper flowers.
 |
| Sospeso Transparente |
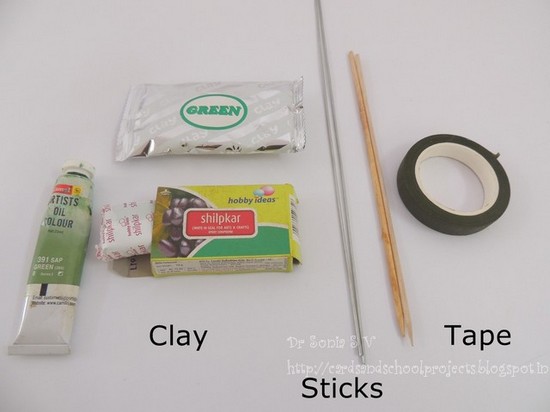
Materials Required
- Clay -to make flower calyxes- you can use the soft types of children's clay in the market [like Amos, Super clay etc]which dries lightweight without cracking or more expensive air drying clay or if you are from India Mseal like I have used here.
- Sticks, skewers, wires etc - to make stems
- Floral tape - to wrap around your stems
If you are using Mseal : Mix in a little green oil color into your mseal dough while you are mixing it [ like I did for my
Altered Bottle art] .Also another important point while working with mseal is you have to work fast to take advantage of the sticky nature of the mseal.
 |
| Flower bouquet tutorial |
- Pinch off some clay and shape it into a cone as shown in the pictorial
- Insert a skewer/ wire into it. Mseal is sticky so you dont have to use glue. If you are using clay you can dip the end of your skewer in glue before inserting it into your clay
 |
| Flower bouquet tutorial |
- Slightly flatten the top of your "clay calyx"
- Stick your clay calyx to the under-surface of your flower using glue. Again if you are using mseal ,you dont have to use any other adhesive if you stick it to your flower while the mseal is still soft and pliable [ once it dries and hardens it become non sticky]
 |
| Flower bouquet tutorial |
- Allow the flower stems to dry
 |
| Flower bouquet tutorial |
- Apply a bit of glue on your floral tape and wrap around your flower stem
- Add leaves if you wish
Here is the link to another
Handmade bouquet tutorial variation with the flower calyx made by quilling .
 |
| Sospeso Trasparente |
I hope you enjoyed my mini tutorials to making the flower center and the flower bouquet . All the little pearl branches are handmade too [ will share how I made them soon!]
You can add Sospeso Trasparente flowers to cards, scarpbook layouts[ big advantage is they dont squish!], home renovation decor glassware, frames, jewelry, photoframes etc
I hope you liked my little "Bouquet of Sunshine" to warm your day this season! Do tell me how it is.
Supplies :All courtesy Shalini Mittal of Crafters Corner


Nenhum comentário:
Postar um comentário